Single Sign-On
The single sign-on feature enables your users to log in to VCC Live without having to enter their login credentials before each login. And with added support for centralized authentication, you can also adapt your existing authentication systems (e.g. LDAP) to work with VCC Live.
Table of Contents
- Using Single Sign-On with OAuth 2.0
- To Implement Single Sign-On
- Using Single Sign-On with Azure OAuth
- To Configure Azure OAuth
- Setting up Automatic User Creation
- To Grant Access to Your Users to the Application
- Things We Will Need
Note: Activating this feature requires an initial setup at both your and VCC Live’s end. For more details, please get in touch with your contact person at VCC Live.
Using Single Sign-On with OAuth 2.0
Our single sign-on authentication method uses the OAuth 2.0 open standard, commonly used for access delegation. Applications using OAuth 2.0 can give third-party applications permission to access the application’s information without revealing login details, such as passwords.
Note: OAuth 2.0 is an open protocol and is not developed by VCC Live.
Warning: Once this feature is enabled, you and your users will no longer be able to log in using the old method, unless you ask us to disable OAuth 2.0.
To Implement Single Sign-On
- You must have an OAuth 2.0 server installed and hosted.
- Register the VCC Live application with the OAuth 2.0 system server. This will enable VCC Live to connect to an authentication system of your choice.
- You will receive access details from the authorization server, including your client identifier, client server name, access token, and more.
- Navigate to your VCC Live account and VCC Live menu > Contact Center > Global Settings > OAuth
- Populate the fields: Scopes, Client ID, Client secret, Access Token URL, Authorize URL, JWKS URI, JWKS, Encryption keys. In VCC-Specific Settings populate ‘Search VCC users by field’, ‘ID token’, ‘Redirect URL’, ‘End session endpoint’
- Your VCC Live users will be able to log in using the OAuth Login button, without having to enter their usernames and passwords. A browser window will appear, where they need to enter their centralized login credentials only the first time. If you have more than one user account, you can choose which account you want to log in with.
Note: During the login process, OAuth 2.0 will return the email addresses to the VCC Live application, and the application will authenticate the users with the email address. This requires you to provide the same email address for all the users in both OAuth 2.0 and the VCC Live system.
Using Single Sign-On with Azure OAuth
For details about this service, see Office 365 identity models and Azure Active Directory and Authorize access to Azure Active Directory web applications using the OAuth 2.0 code grant flow.
Note: This feature requires you to have a Microsoft account with access to Azure Active Directory.
To Configure Azure OAuth
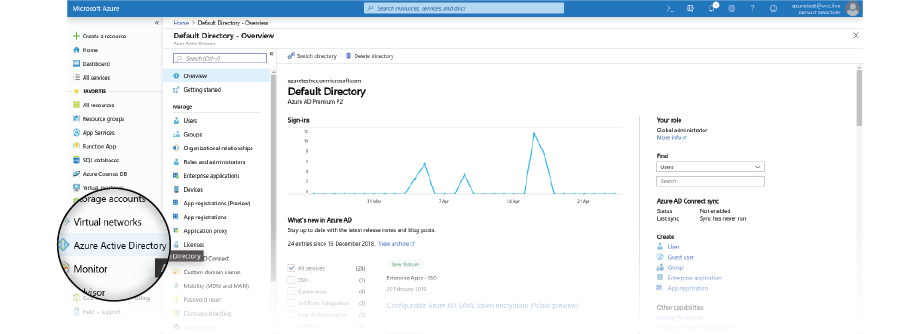
- Log in to your Azure Dashboard, then select Azure Active Directory.
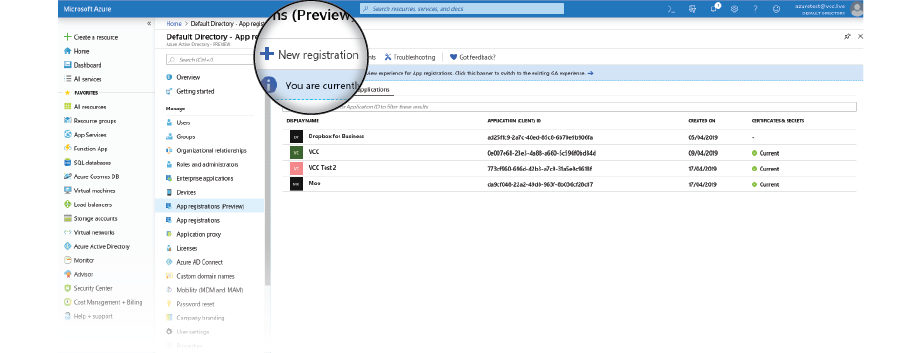
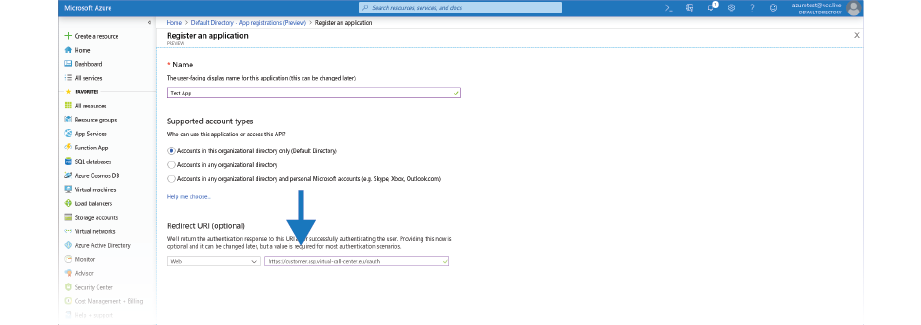
- Select App registrations, then select the New Registration button to create a new application.
- In the text box below Redirect URl, type in your VCC customer URL with an OAuth endpoint. For example: https://somecustomer.asp.virtual-call-center.eu/oauth
- Now set up a client secret. Navigate to the Certificates & secrets panel, then select the New client secret button.
- Set expiration to Never.
- Make sure you save the generated secret — you will need it later.
- Optional: Select the Upload certificate button to upload an SSL certificate.
Note: If your users are assigned to too many groups and roles in Azure, you might face issues with the login in VCC Live. You can check the following guides about how to rectify this issue in Azure here and here
Setting up Automatic User Creation
If you would like to set up the integration in a way that it also automatically adds new users, you will need to set up the following as well.
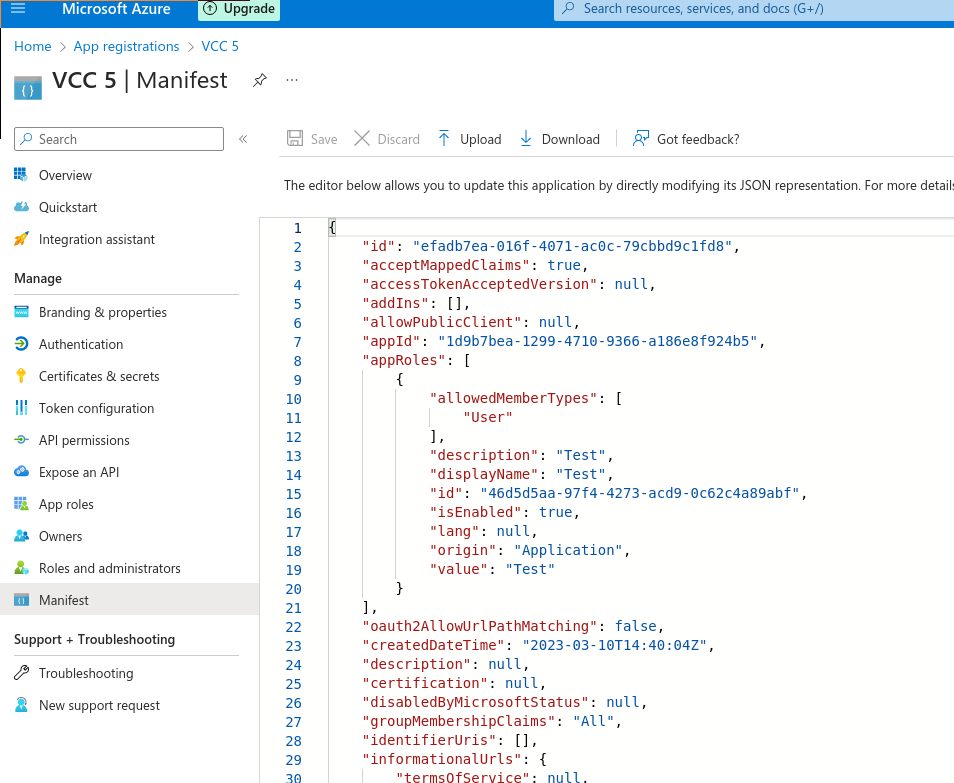
- acceptMappedClaims in the app Manifest under App registrations is set to true
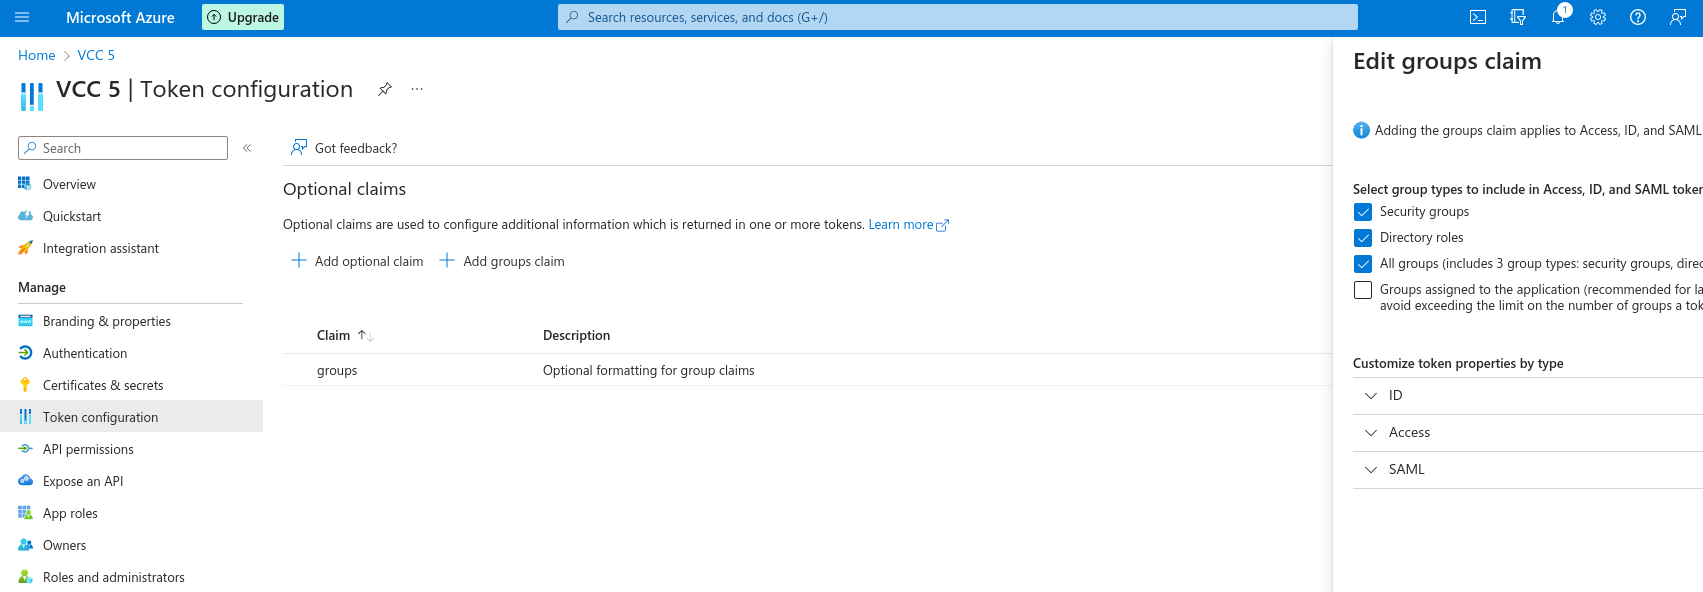
- in Token configuration under your App create a group claim where All groups is checked
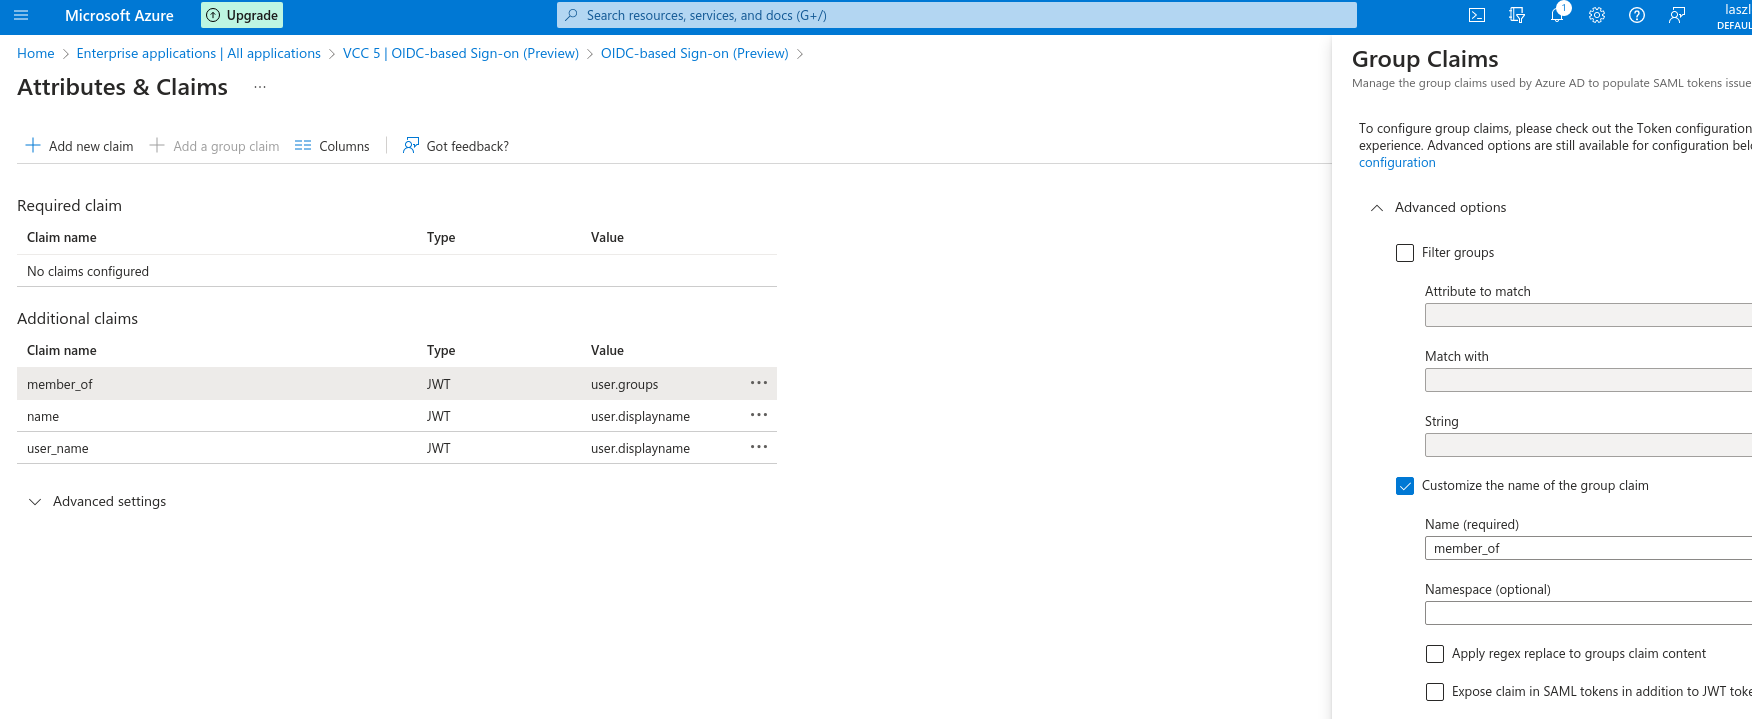
- under Enterprise applications when you navigate to Single Sign-on / Attributes&Claims create 2 claims and modify the existing one:
- Name: name, Source attribute: user.displayname
- Name: user_name, Source attribute: user.displayname
- Modify user.groups claim to member_of
You are now done with the basic configuration. To finalize the configuration:
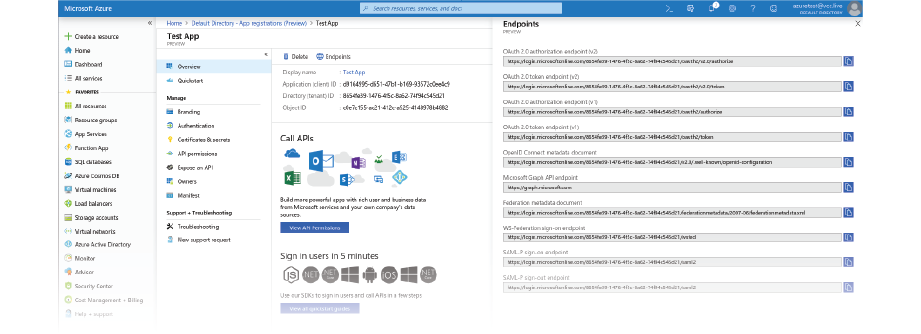
- Navigate to the Overview panel, then click on the Endpoints button.
- You need to forward your configuration details to us so that we can configure your access on our side. You can find all the necessary information for your app on the Overview panel.
To Grant Access to Your Users to the Application
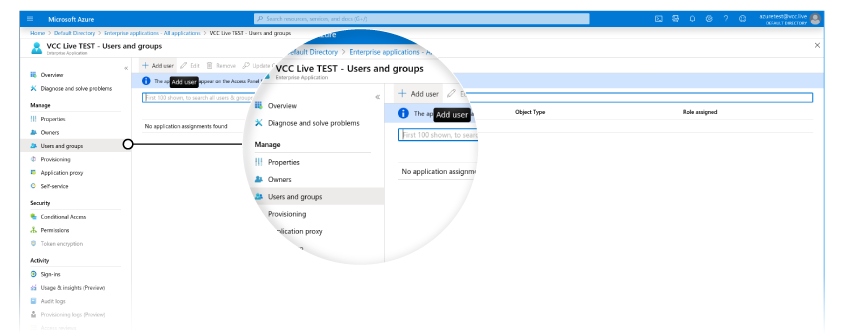
- Navigate to the Enterprise applications menu, then select the app you created.
- Select the Users and groups section, then press + Add user.
Things We Will Need
- Application ID
- Application secret (the one you have created previously)
- OAuth 2.0 authorization endpoint (v2)
- OAuth 2.0 token endpoint (v2)
- ID of user groups (to be able to map them to user groups in VCC Live)
Related articles
There's always more to learn. Discover similar features by visiting related articles:





Comments
Can’t find what you need? Use the comment section below to connect with others, get answers from our experts, or share your ideas with us.
There are no comments yet.