Setting up VCC Live Archiver
Estimated reading time: 5 minutes | Target users: Supervisors, System Administrators
VCC Live Archiver is a console application that is initiated from a command line such as Windows® Prompt or Linux Shell. It can be used to archive and download call recordings, and export CDR log data from the VCC Live application.
In this lesson, you will learn:
- How to connect VCC Live Archiver with the VCC Live application
- How to set up and execute VCC Live Archiver
1. Registering VCC Live Archiver in the VCC Live Application
In order to allow VCC Live Archiver retrieve data —such as your call recordings and CDR logs— from the VCC Live application, you need to connect the two. This includes the following:
-
Registering your IP address(es) in the VCC Live application. This will allow VCC Live Archiver installed on your workstations —inside the range of IP addresses you enter— to seamlessly communicate with VCC Live’s servers.
-
Creating an application token in the VCC Live application. This token will enable your copy of VCC Live Archiver to interact with the VCC Live application.
1.2 Creating a Token
- VCC Live: from the VCC Live menu, select Contact Center > Global Settings.
- Select the Database API tab.
- In the IP filters textbox, insert the IP address, IP range or domain from where you want to access VCC Live Archiver.
- Press New token button to create a new token. You may need to scroll down to see the button.
- Enter an application name.
- Enter the resource references you want to use. Text in regular expressions is escaped. Asterisk (*) is replaced with (.*), question mark (?) is replaced with ([^/]+). See Database API references.
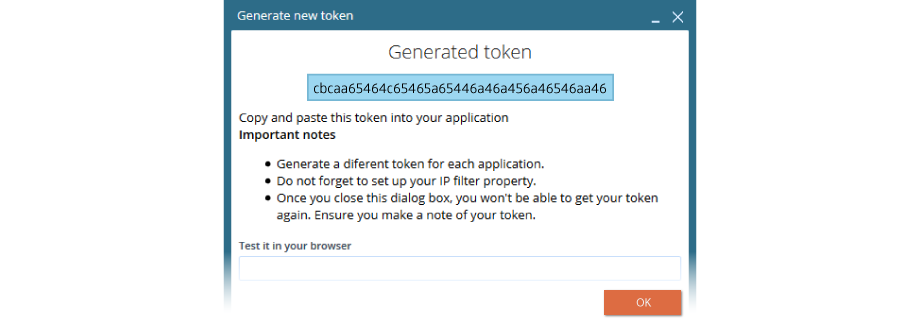
- Press Create button to generate your token.
- Make sure to write down this token, for example, by copy-pasting it to your clipboard, notepad or a text editor software.
Warning: Once you close the New token dialog box, you won’t be able to return to it to make changes or get your token again. Therefore, ensure you make a note of your token before closing this dialog window.
2. Setup Procedure
VCC Live Archiver does not require installation. Once downloaded, the application can be executed from a command line.
2.1 Downloading the Application
- Visit our download site to download the application.
- Select the right version for your operating system, then press Download.
Note: In order to run VCC Live Archiver, you need make sure your firewall settings are correct. For more details about firewall requirements, see Firewall Settings.
2.2. Executing VCC Live Archiver for the First Time
- Create folders where you want to download call recordings and log files.
- Launch VCC Live Archiver.
- In the CUSTOMER line, enter the desired information. Press enter.
- In the PASSWORD line, enter the token key you have already generated in VCC Live. You can insert it by copying the token from the Generated token field in VCC Live, and then insert it here using your mouse’s right button. Press enter.
- In the VOICE_FILE_DIR line, insert a path to a location where you want to store your voice files. The path or folder’s name cannot contain spaces or any special characters. Press enter.
- In the MOBIL_VOICE_FILE_DIR line, insert a path to a location where you want to store the voice files recorded using your phone. Press enter.
- In the IGNORE_BEFORE line, specify a date. Only recordings created after this date will be downloaded. Press enter.
- In the LOG_FILE_DIR line, insert a path to a location where you want to store the log files. Press enter.
Note: Configuration parameters are stored in an .env file, which can be found in the same folder where you launched VCC Live Archiver from. It can be edited using a text processor application.
Congratulations!
You’ve just set up VCC Live Archiver.
Ready for the next lesson? You’ll learn how to run VCC Live Archiver from a command line.
Start lesson >


Comments
Can’t find what you need? Use the comment section below to connect with others, get answers from our experts, or share your ideas with us.
There are no comments yet.