First Steps — User Interface, Navigation, and Basic Settings
Estimated reading time: 8 minutes | Target users: New users
Welcome to the first VCC Live tutorial lesson. Before you start creating your database and first project, let’s take look at the VCC Live user interface and navigation basics, as well as some basic settings.
Note: This article assumes that you’ve VCC Live installed on your computer. For instructions on how to install the application, see Installing VCC Live.
In this lesson, you will learn:
- How to access your workspace and navigate your way around in VCC Live
- What are some useful settings you can adjust are
1. The Login Screen
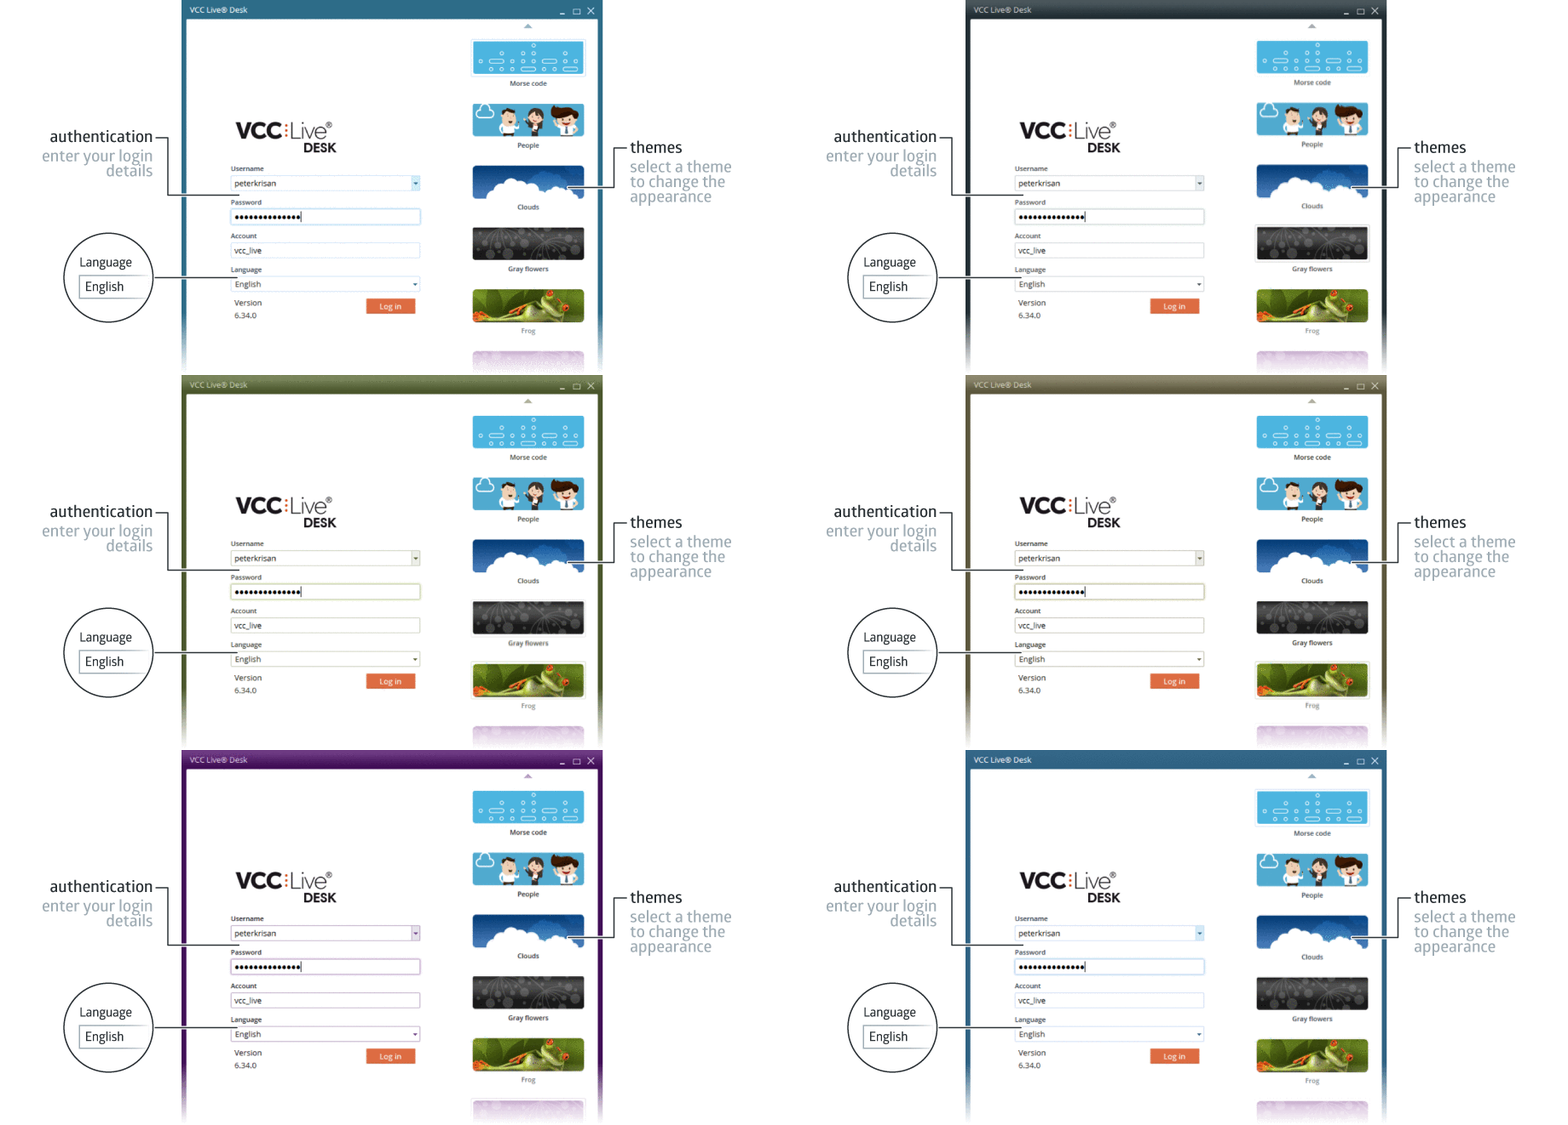
When you start VCC Live, the login screen appears. The login screen is where you can authenticate yourself in order to access your VCC Live workspace, as well as set the user interface’s appearance and language.

1.1 User Interface Language
You can change the VCC Live user interface language to a variety of languages. Changing language settings affects the text of all buttons, menus, dialogs, and messages. However, language settings won’t affect the proofing language of the spell checker function when for example, editing emails.
Note: Only the English- (US), German- (Germany), and Hungarian-language versions of the interface are fully translated. Other language versions available are being finalized.
For instructions on how to change the user interface language, see Login Screen.
1.2 User Interface Themes
You can customize the VCC Live user interface appearance using themes. A theme is a visual styling of individual elements on the user interface, such as the graphics on the frame or the icon color. By applying one of the wide variety of themes, working in VCC Live can be a more fun and personalized experience.
For instructions on how to change the user interface appearance, see Login Screen.
1.3 Authentication
When you log in to VCC Live, you need to submit your username, password, and account name in order to access your account. The account name is your company’s account name, but the username and passwords are your own identifiers.
Whether you work as an administrator, supervisor, or agent, you need to sign in via the login screen. However, depending on your account type, you will be logged into either the admin or agent workspace.
For more details about the login screen, see Login Screen.
2. The Admin Workspace
When you log in using an admin or supervisor account, you are presented with the admin workspace. The admin workspace contains all the necessary features needed by an admin or supervisor. It allows you to manage users and projects, upload or modify databases, tweak various settings, create email or SMS templates, and even set up your IVR. You can also utilize a number of tools for quality management, script editing, and more.
For more details about the admin workspace, see Admin Workspace.
2.1 The Project List Pane
The project list pane displays a list of your project folders and projects. You can also create, delete, clone, or organize your projects from this pane.
2.2 Taskbar
The taskbar, located along the left edge of the window, shows which worksheets are currently open in VCC Live, allowing you to easily switch between tasks. You can also pin worksheets to your taskbar. Pinned worksheets remain open even after you restart the application, making your most frequently used worksheets easy to access.
Note: If you close all worksheets, the taskbar disappears.
2.3 Status Bar
The status bar displays various status information, for example, your username, storage information, and more.
2.4 Accessing Settings
We distinguish between three types of settings, depending on the scope of what the setting affects:
- Generic settings: Accessible via the VCC Live menu, changes made to generic settings apply to all projects, users, and resources.
- Project-specific settings: Revealed when you select and expand a project in the projects list. Changes made to project-specific settings apply to the selected project only.
- Local Settings: Accessible via the VCC Live menu, local settings are stored locally on your computer rather than in the cloud. See Local Settings.
3. Basic Settings
There’re a few basic settings you may wish to adjust.
3.1 Alerts and Notifications
You can request generic news, technical updates, security notifications, balance inquiries, and contract-related information to be sent to you automatically via email. You can also add other admin or supervisor users to the subscription list.
For instructions on how to adjust alerts and notifications, see Spell Checker.
3.2 Spell Checker
The spell checker is very handy when typing text as it flags words that may not be spelled correctly with a red wavy underline.
For instructions on how to enable the spell checker function and select a proofing language, see Using Spell Checker.
Congratulations!
You’ve just learned how to navigate your way around in the VCC Live application.
Ready for the next lesson? You’ll learn how to create a simple database.
Start next lesson >


Comments
Can’t find what you need? Use the comment section below to connect with others, get answers from our experts, or share your ideas with us.
There are no comments yet.