Quota Tool
Estimated reading time: 11 minutes | Target users: Campaign Managers, Supervisors
The quota tool allows you to create surveys, with a set of questions addressed to a specific number of participants and target groups. Depending on your needs, you can perform statistical studies or surveys based on participants’ age group, gender, location, and more.
In this lesson, you will learn:
- What is the quota tool
- What are the types of quotas
- How to set up a quota project
Recommended knowledge:
- Basic knowledge of database management
- Basic knowledge of agent script management
1. Cell and Edge Quota Fields in the Database
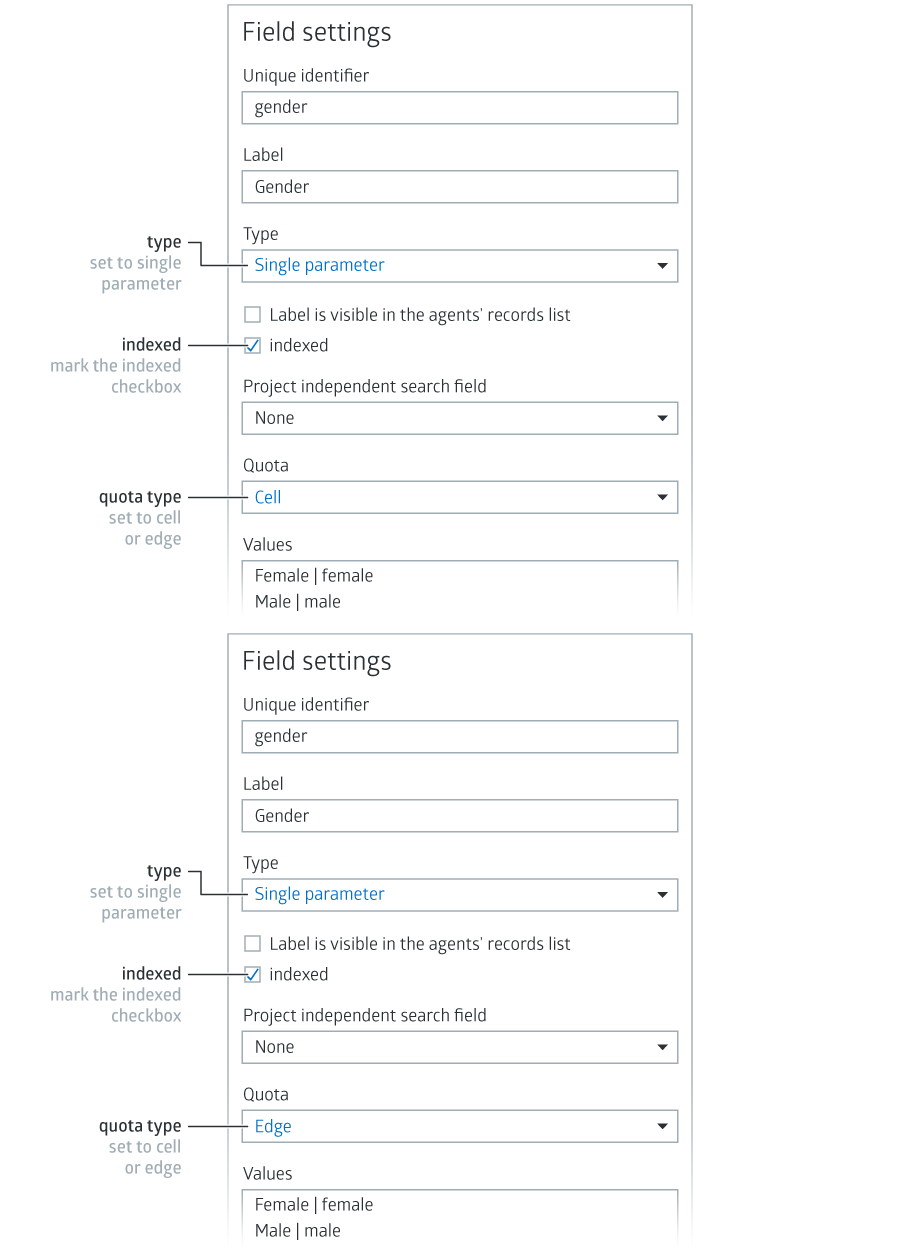
To utilize the quota tool, you’ll need to add a quota field to your database. A quota field is an average single parameter field, but it has the indexed and quota (cell or edge) properties set in the field’s setting. This allows the quota system to know if the required number of participants has been asked to complete the survey.
1.1 The Difference Between Cell and Edge Quota Fields
We distinguish cell and edge quota fields, depending on the survey or study results you want to achieve.
Cell quota: It is used when there is an “and” relation between the requirements set for your quota, for example, you need to ask 150 women to complete the survey and they must live in Chicago. This means you need a gender and city/town field in your quota, both marked as cell quota fields, and the survey can only be completed when the people your agents contact fulfill these requirements.
Edge quota: It is used when there is no required connection between the fields you use.
Warning: You cannot create quota fields in parent projects’ database, they must be added before upgrading a project to a parent project. Parent projects are indicated with a capital “(P)” at the beginning of project name.
1.2 Adding a Cell or Edge Quota Field to Your Database
- Select a project from the project list, then select Database > Fields.
- Select Create new field.
- Enter the Unique identifier.
- Enter the Label. This is the field name that the agent will see.
- Select Single parameter field type in the Type drop-down list.
- Select Edge or Cell from the Quota drop-down list.
- Mark the Indexed checkbox.
- Press Create field.
Note: Read more about database fields in the Managing Fields section.
2. Creating a Script Quota Page
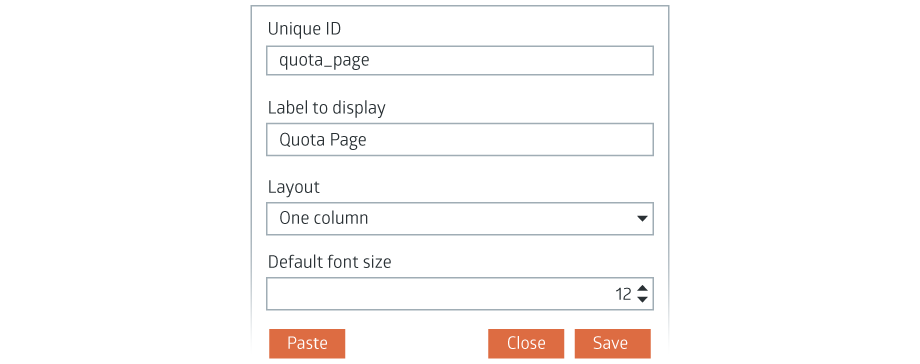
For using quota, the script that contains the questions for your survey must have the right settings. Let’s create a quota script page:
- Select a project from the project list, then select Script editor.
- Select Script.
- Hover your mouse over Datasheet or the Script menu, then press
.
- Enter an ID, label, select the layout properties, then press Save and Close.
- Expand the Script menu, then select the script you just created.
- Mark the Quota page checkbox.
- Add a Radiogroup control from the toolbar.
- Select the Label tab end enter a name for the control, that appears for the agent.
- Mark the On the left side of the controller or Above the controller radio button.
- Select the Radiogroup tab.
- In the Field pane, select the quota field you created from the drop-down list.
- Press Save and upload.
Note: Read about adding controls in the Customizing Datasheets and Scripts section.
3. Quota Completed Page (Optional)
When using the quota tool, we distinguish two cases:
Quota with known values: when you already have records with the known values required for your quota, for example 100 woman who live in New York, and your agent contacts them in order to complete the survey. In this case, when the quota is completed, the rest of the records are not dialed and they receive the “Quota” disposition.
Quota with unknown values: when you have a record database with phone numbers but other unknown values, but, as you still need to complete the quota, agents enquiring about the other values as they go along
In the latter case, you can create a script quota page that pops up on an agent’s screen when the quota goal is met. This is useful when you’re reaching out to people who are not on your database. Again, for example: you need to ask 100 women living in New York to complete your survey. Your agents start calling the new numbers from your database, but their location and gender is unknown, and you only find out this when calling them. Once the required number of people has been asked, the screen pops up.
3.1 Creating a Quota Completed Page
- Select a project from the project list, then select Script editor.
- Select Script.
- Hover your mouse over Datasheet or the Script menu, then press
.
- Enter an ID, label (for example, Survey Completed), select the layout properties, then press Save and Close.
- Expand the Script menu, then select the script you just created.
- Mark the End page checkbox.
- Add a Text control from the toolbar.
- On the Text tab, enter a text that will appear on the page, for example, “Survey Completed”.
- Press Save and upload.
When the quota goal is met, a page pops up on the agent’s screen.
4. Creating a Quota Disposition
To complete the quota process, you need to create a quota disposition, for example, Successful Survey.
- Select a project from the project list, then select Dispositions.
- Press New disposition.
- Enter a name and set the desired settings. Mark the Quota checkbox.
- Press Add disposition.
Note: Read about dispositions in the Managing Dispositions section.
5. Using the Quota Worksheet
The quota worksheet gives you an insight into the project’s quota results, and allows you to set your requirements, for example the number and properties of the target group needed to complete the survey.
- Select a project from the project list, then select Database > Quota.
The pane on the top of the worksheet shows your Edge quotas. The pane on the downer right shows your Cell quotas. The pane in the bottom left-hand corner shows your quota fields.
- To set how many people you need to ask to complete the quota, double-click on the value in the Value set column.
- To create a connection between your cell quota fields, drag and drop one row below the other field.
Tip: Read about tracking current changes related to your quota results in the Quota Wallboard section.
Congratulations!
You’ve just learned how to create surveys or statistical studies using the quota tool in VCC Live.


Comments
Can’t find what you need? Use the comment section below to connect with others, get answers from our experts, or share your ideas with us.
There are no comments yet.