Outbound Email Customization
Estimated reading time: 4 minutes | Target users: Supervisors
Personalize your outbound emails from VCC Live with dynamic email contents. These are variables you can insert in an Email template when composing a message, for example during a Mass email campaign. They are useful in helping you to create more personalized and customized emails that are unique for each of your recipients. You can use a large number of variables that can relate to specific parameters of your project, agent, or the addressee, in a highly-customizable format.
In the following example, let’s take a look at how to add dynamic email content to your emails.
Workflow – Working with the project (for agents)

Scenario
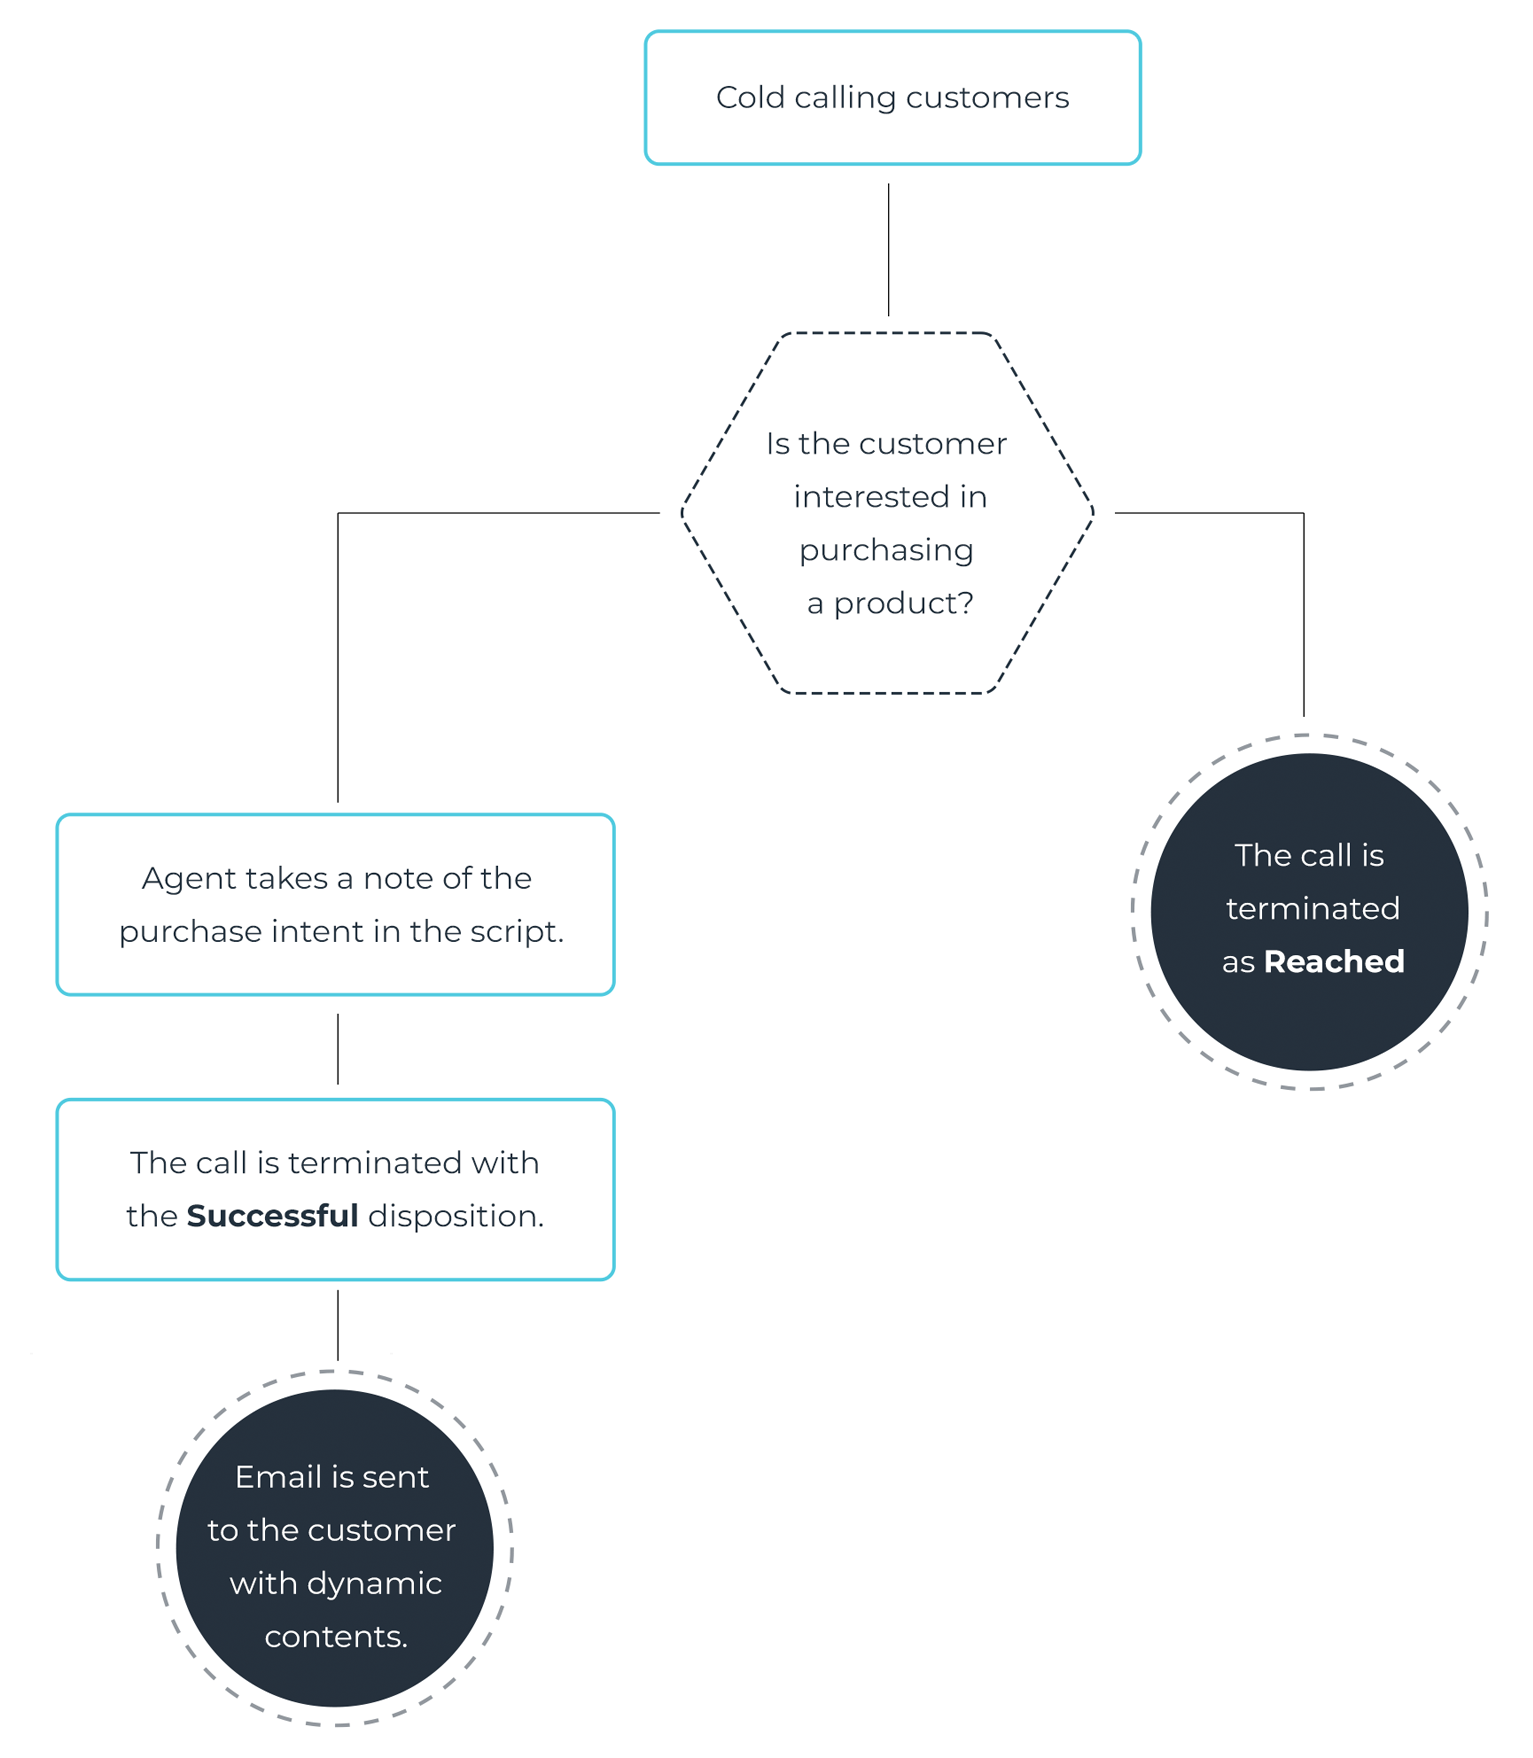
Let’s say that your agents are calling your customers in order to sell a product, that is a service or accessory for cars. When a customer agrees to purchase a piece of accessory, the agent takes a note of their purchase intent in the script while talking to the customer by clicking on the applicable radio button. When the conversation ends, the system sends a confirmation email to the customer. Sending the email can be triggered by a Successful disposition, and the email includes a description of the purchased product.
Workflow – Setting up the project (for supervisors)
Step by step
-
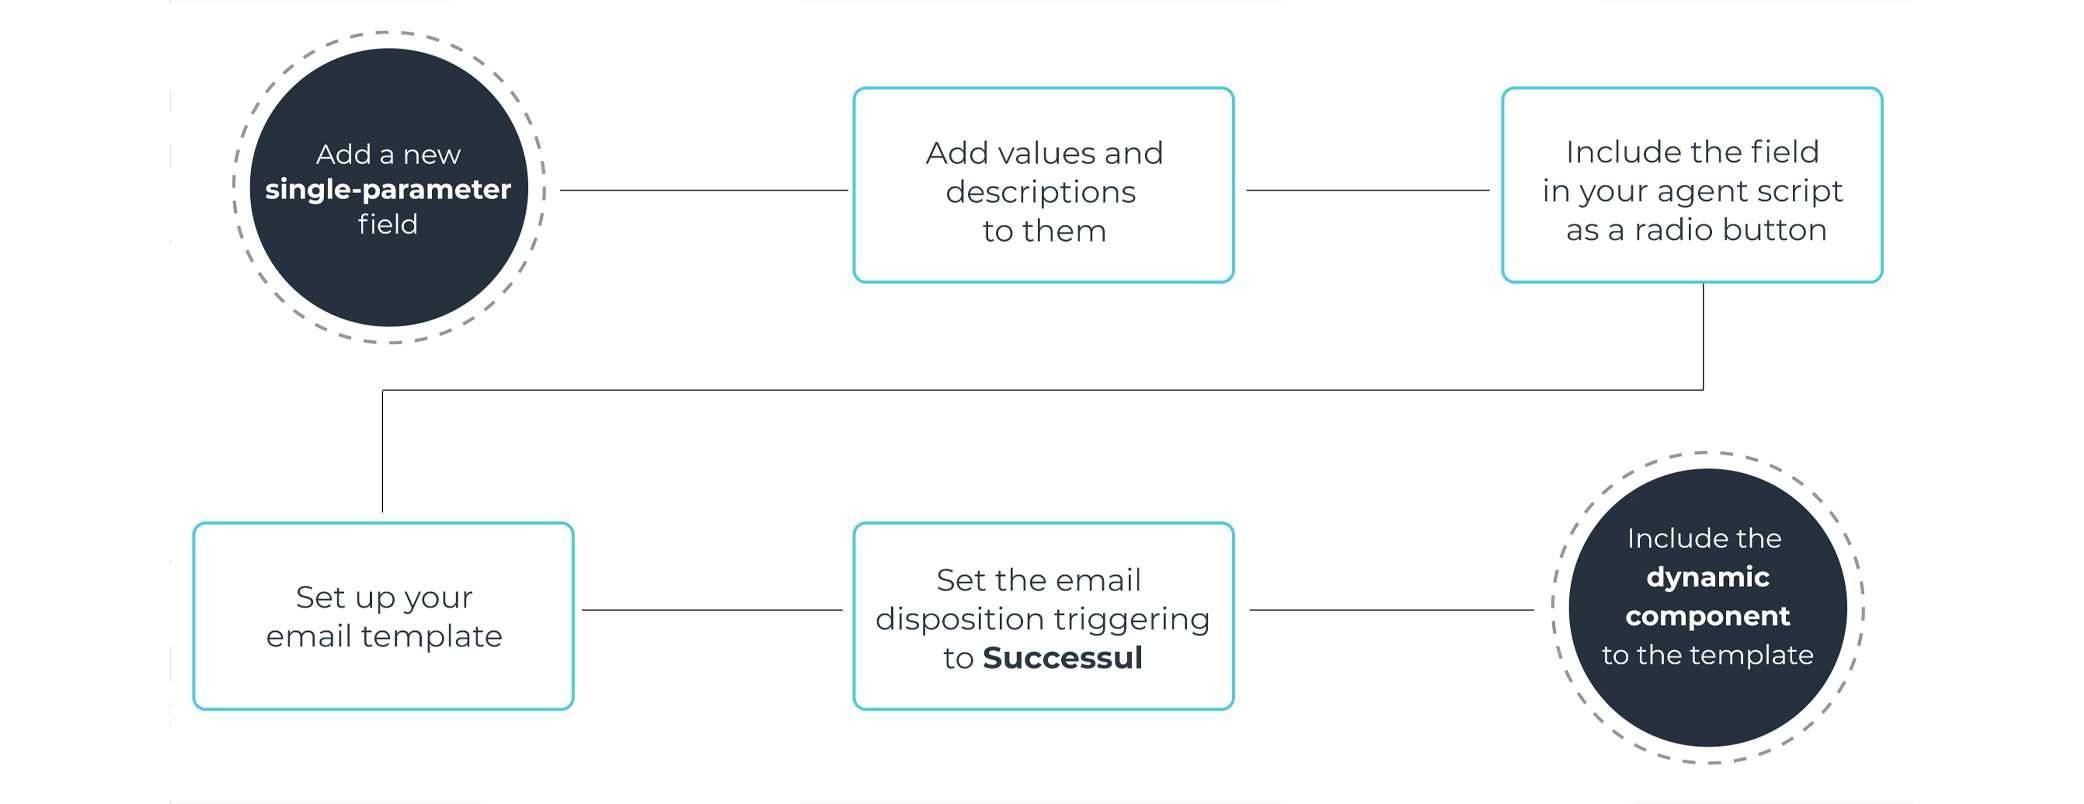
Add a new single parameter field called product, which has no values yet for your records in the database. You can add a field at Project > Database > Fields.
-
Set it up along with the values and their descriptions by following these steps:
- Select the field
- Enter a name and description for a new value at the bottom of the right-hand-side pane
- Press Add value
-
Once you have added the field to your database, include it in the agent script with a radio button. You can add a radio button by dragging and dropping it on the Project > Script Editor > Datasheet or Script screen.
This means that your agents will be obliged to choose one of the values available, while in the email template you can use either label, value, export value or description, depending on your requirements. In this example, we will use the description of the product.
-
Go to your Project > Channels > Email, and set up an email template. If you’re not familiar with setting up email templates, here’s how to do it.
-
On the disposition-triggered email sending tab, mark the checkbox for Disposition: Successful. This means that a Successful disposition will trigger sending this email template.
-
Include the {product.description} variable in the email template. This would insert the chosen accessory’s description automatically to your email. Accordingly, you can use other variables such as {name.value}, or {product.value}.
-
Congratulations, you’re done! Now your email template with dynamic email contents is ready to be sent, triggered by a Successful disposition.
-
To read more in detail about Dynamic Email Contents, click here.
-
To read our user guide on Emails, click here.


Comments
Can’t find what you need? Use the comment section below to connect with others, get answers from our experts, or share your ideas with us.
There are no comments yet.