Get to Know the Campaign Manager
Estimated reading time: 10 minutes | Target users: Campaign Managers
When you have a large set of customers you would like to reach out to, VCC Live’s Campaign Manager tool could be a great tool for you to automate managing campaigns and your database.
In this lesson, you will learn:
- How to create a database in the Campaign Manager
- How to import data
- How to filter your data
- How to manage your collections
- How to load your customer records to VCC Live projects
1. Database
First, you need to create a database to manage your customer records in VCC Live’s Campaign Manager. The database defines the fields you want to use across customer records and contains collections (a filtered list of customers) that you can later load to projects in VCC Live.
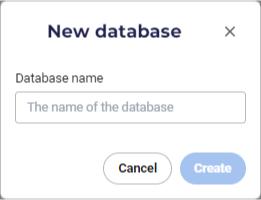
Click on the + Button to create a new database and give the database a name.
Now create some fields for your database. These fields can be used later on for agent scripts or automation of tasks within the system.
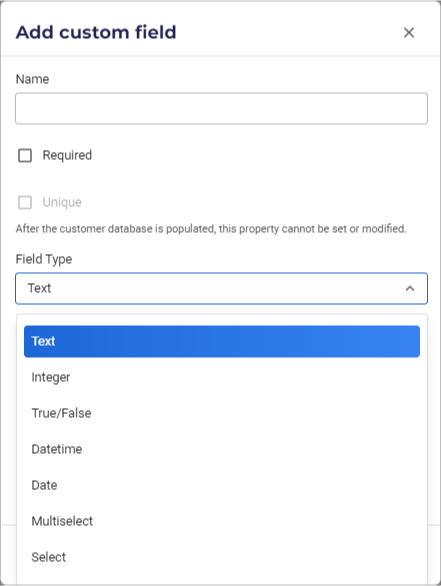
Navigate to the Custom fields tab and select Add new field.
You need to give your field a name that will be used across the system. You also need to define the type of data that will be stored here (e.g. Text, Integer) and whether data in this field is required and/or unique.
- If an attribute is marked as Required, then you won’t be able to upload data without this attribute populated.
- If you mark an attribute Unique, then all records will need to have unique values in this field. You can only mark an attribute unique when no records exist in the database.
- If you are using Multiselect or Select, you need to add the possible values here.
Note: Some fields are automatically created in the system for each database, including name and contact fields as phone or email
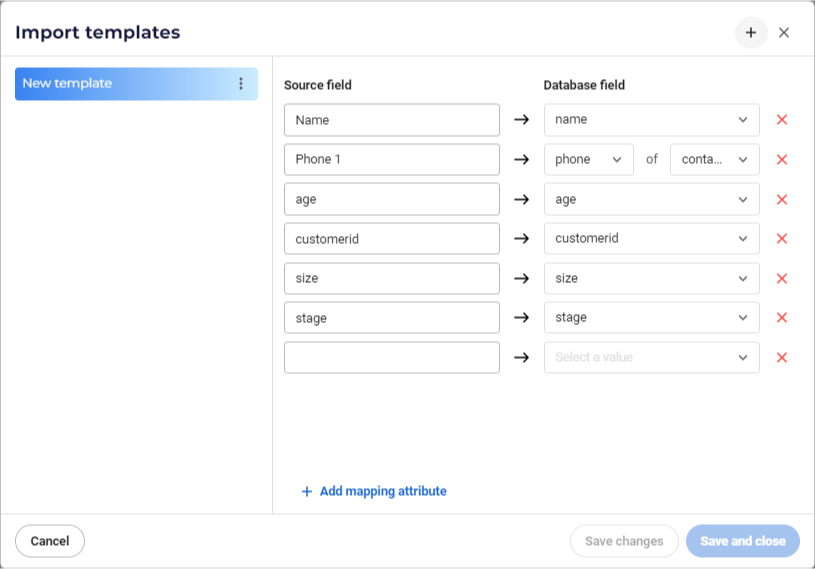
After creating your fields, you can upload data via API already (you can read more about it here). If you would like to upload data from a CSV file, you need to create a template that maps your file to the database.
Navigate to the Customers tab and in the top right corner open up the menu. Select Import templates and + Button to add a new template. To create mappings, click on Add mapping attribute. In the Source field column, define the column name in your CSV file that will be loaded. In the Database field column define which attribute the value from the CSV loaded into.
2. Importing Data
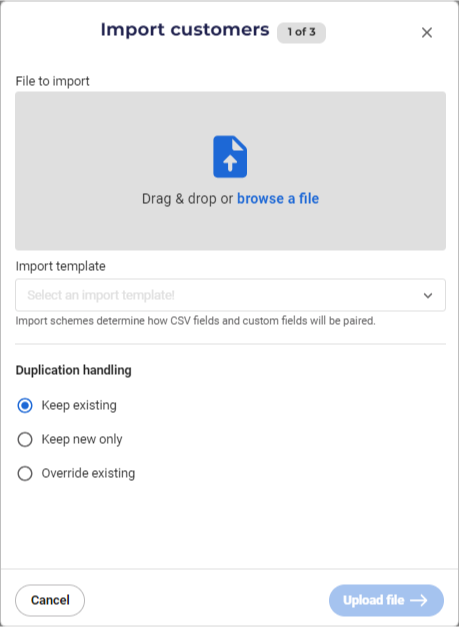
If you would like to import data manually, navigate to the Customers tab, and in the top right corner select Import.
You can add the CSV file that you would like to import and you need to select an Import template that will be used for mapping. You also need to define the Duplication handling that shall be applied during import. This is only relevant if you have a Unique field in the database. If the imported file contains a record with the same unique attribute value that already exists in the database, then you can define what should happen after the import. ‘Keep existing’ won’t change the existing data in the database if there is a duplication, while ‘Keep new only’ will replace the existing record with the new one. ‘Override existing’ will modify the existing record with data from the imported record, where there are differences.
You can start the upload by clicking Upload file
Before the import is finalized, you can check whether there are any errors in your file. If errors occur, you can download them and later re-upload them when corrected. At this stage, you can still decide to cancel the import or finalize the import of the correct records.
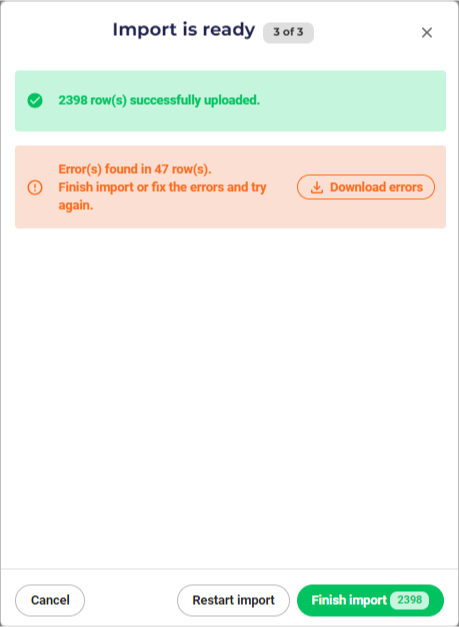
When you finish your import, the imported customer records will appear on the Customers tab.
3. Filtering Data
When you have a large database of customers, it could be useful to segment the database by a business rule that you would like to apply.
Navigate to Customers and then select Filters.
In a filter, you can define one or more filter criteria that will be applied to narrow down your customer database. Multiple filter criteria can be applied, in which case they are combined in an AND statement. Additionally, you can sort and limit the result, if later you would like the system to work with the customer records in a specific order.
To see the result, press Apply.
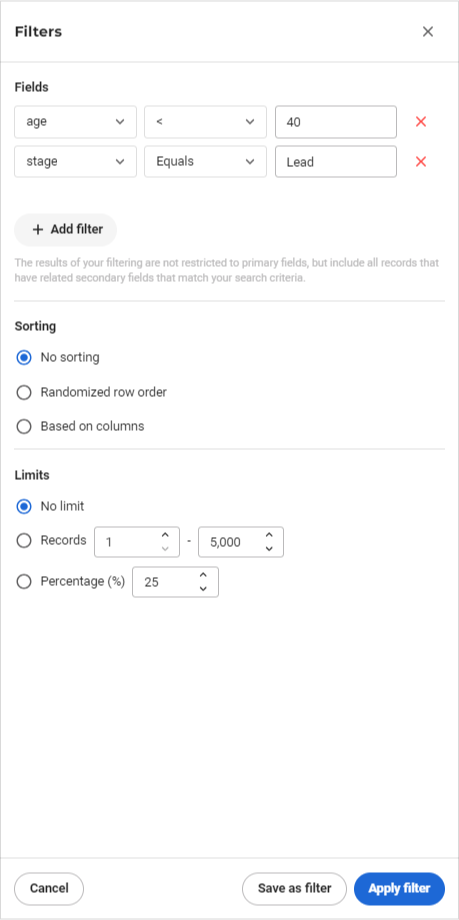
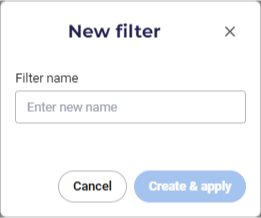
You can also save your filter for later by clicking Save as filter. You can also name your filter for easier use.
4. Managing collections
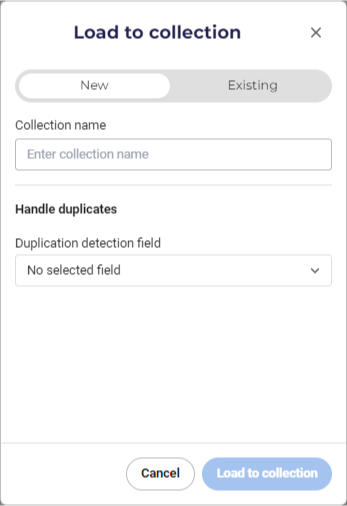
Once you have a filtered dataset, you can create a collection, which will help you load your data to one or more VCC projects and initiate dialing with agents. Navigate to the top right corner and in the menu select Load to collection.
You can decide to load your filtered dataset to a new or an existing collection. You can also select a field that will be used to detect duplications on a collection level, which will prevent the loading of duplicated records into that collection based on values in that field.
Click Load to collection to initiate loading.
Once loaded, the results will appear in the Collections menu. You will see the total number of customers in a collection and also the number of unassigned customers, which haven’t been loaded to a VCC Live project yet.
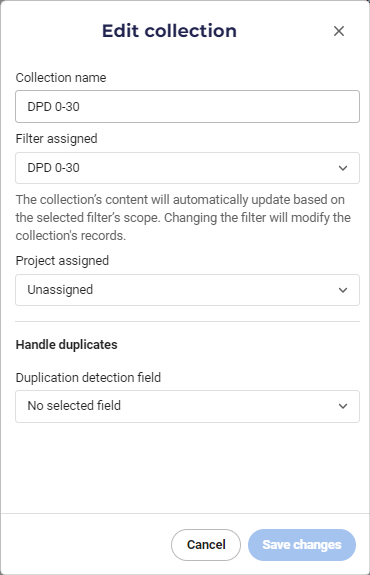
If you open the menu for a collection and select Edit, then you can assign a filter to a collection directly. This is a powerful feature that can make your processes fully automated.
When you assign a filter to a collection, the solution will evaluate every data change that happens in your database and modify the set of customers in the collection if it is needed by the filter.
This means that if a new customer is added that matches the filter, then it will be automatically added to the collection.
If a customer’s data changes and it no longer matches the filter, then it will be automatically inactivated in the collection. If it was loaded to a project previously, then it will be automatically closed with a predefined disposition.
5. Load Customer Records To VCC Live Projects
When you are ready to load the set of customers in your collections to projects in VCC Live (for outbound or inbound communication), you can load the customer records manually or automatically to the projects.
To automatically load customers to a single project, navigate to Edit and select the project you want to choose in Project assigned. You can select a single project, into which each customer record will be loaded from the collection. If a new customer is added to a collection, then it is also automatically added to the project.
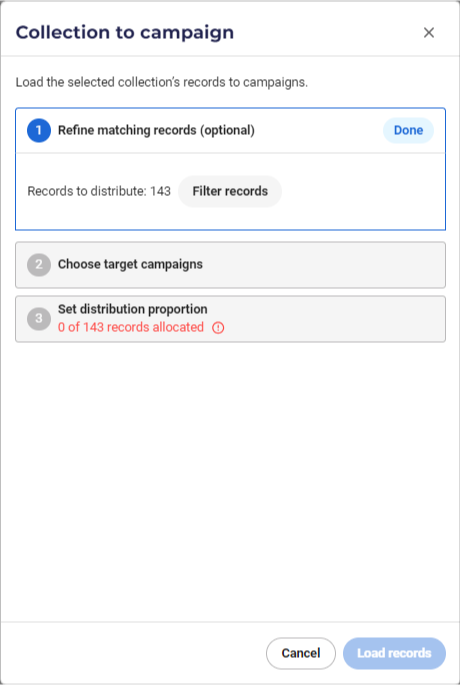
You can also manually load customers from a collection to one or more projects by selecting Add to campaign. When selecting this option, you need to go through 3 steps.
In the first step, you can filter the records from the collection further, if you don’t want to proceed with all records from this collection. You can also change the sorting or apply limits. When you are ready, click Done.
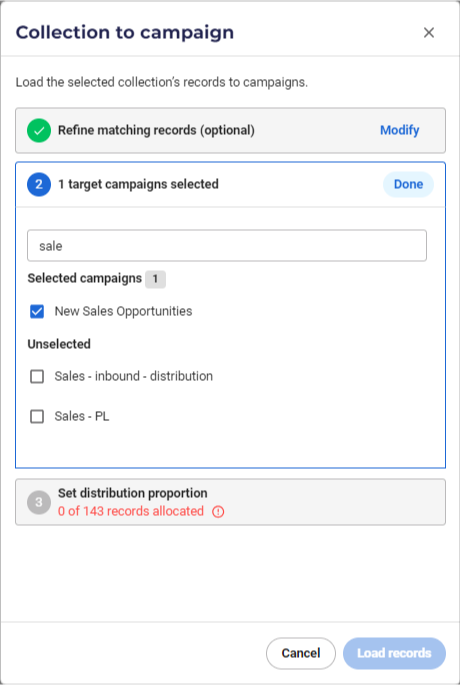
In the second step, you can select which projects you would like to load your selected records. When you are ready, click Done.
In the final step, you can allocate the available records to the selected projects in any potential distribution. You cannot allocate 0 or more than the number of available records to a project. When you are ready, click Done.
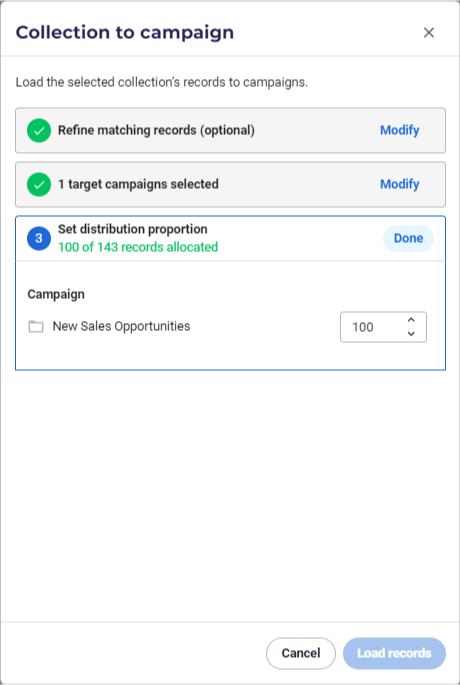
You are now able to load the customers to the VCC Live projects by selecting Load records. When clicking on this option, data will be transferred to the projects and agents will be able to immediately work on them depending on your project settings.




Comments
Can’t find what you need? Use the comment section below to connect with others, get answers from our experts, or share your ideas with us.
There are no comments yet.