Customizable Queue Announcements
In this tutorial, you will learn how to set up a waiting time or place in queue announcement for a new language for which a sound library is not yet available. This way, you can tailor the waiting time or place in queue announcement functionality in an IVR to new languages of your choice.
In this lesson, you will learn:
- How to create a new IVR Sound library for a new language
- How to change unique sounds
- How to parameterize your queue to utilize your new sounds
1. Creating an IVR Sound Library for a New Language
In case you wish to upload a language that is currently not available in VCC for the queue announcement, you can do that on VCC Live’s interface by yourself.
- First, you need to find a language where the uniqueness of the numbers matches your desired language. For example, in English, the numbers are unique until 20, in Hungarian, until 29.
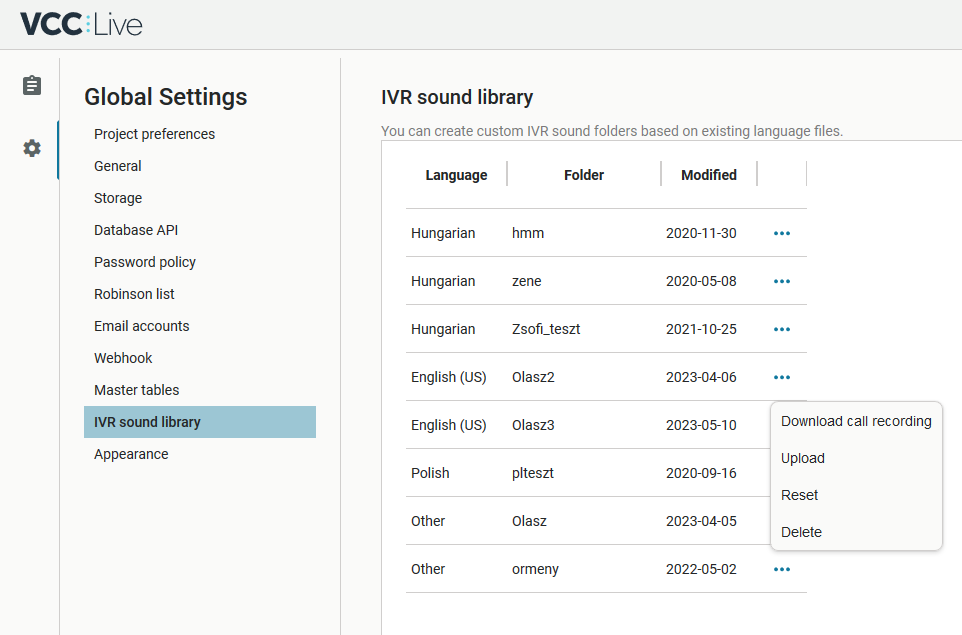
Uniqueness means that it is not possible to create the number using two sounds. In English, we do not say ten and one for 11, we say eleven. We do not say ten and two for 12, but say twelve and so forth. - Once you have the base language, you need to download it from the IVR sound library. You can do that by navigating to VCC Live/Contact Center/Global Settings/IVR sound library and then clicking on the 3 dots and then selecting the Download call recording
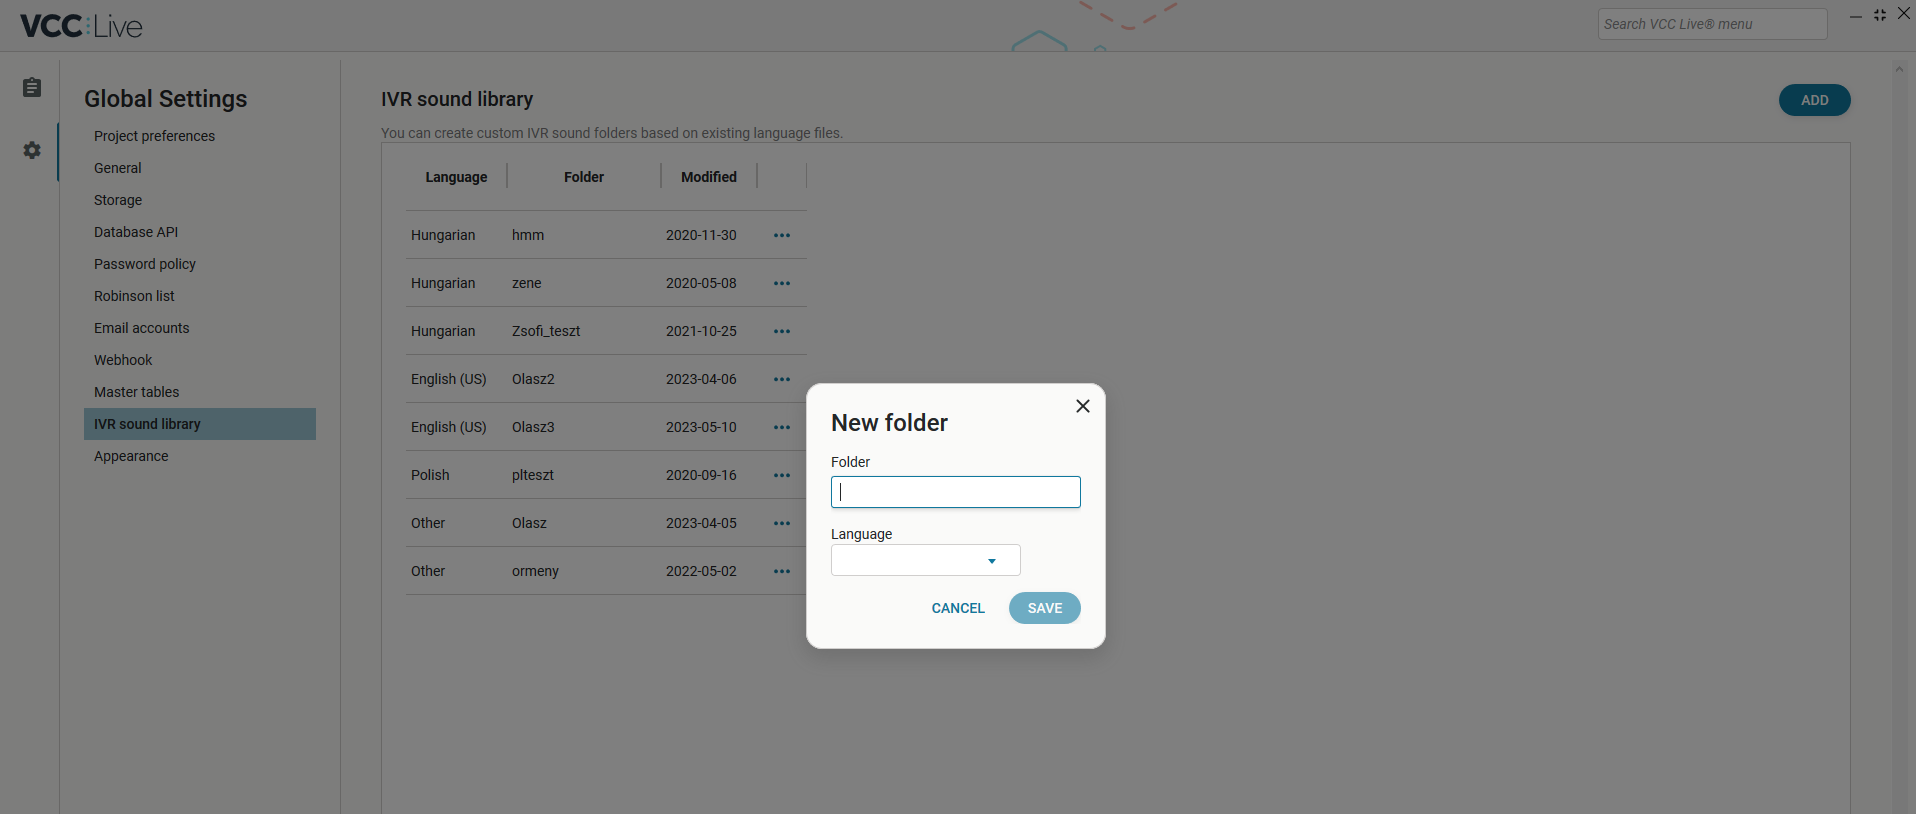
After the download, you need to create a new folder for the new sounds. You can do that by selecting in the top right corner Add and then naming the folder and selecting a language of your choice.
Note: The name of the folder can be whatever you need it to be, for example, Italian. The language has to be your base language (e.g. English).
2. Changing sound files
In the files you have downloaded, you can find multiple different folders. To be able to change different voices, you need to modify the content in different folders:
- The numbers can be found in the digits folder.
- The time sounds (hour, minute, second, etc.) can be found in the time folder.
To change voice files, you need to replace the unique files. The files are named according to their content (e.g., 1, 2, 3, 11, 30, 40, 90, …)
The same applies to the hours, minutes, seconds, etc. These sounds can be found in the time folder.
Warning: Do not change the path of a folder and do not rename the files, only replace them. Do not remove files from the folders, only change the ones that you require.
When you are finished, navigate to the IVR Sounds Library that you have created and select Upload. Upload the modified folder in a .zip format.
3. Setting up a Queue with your new language
In the IVR queue where you would like to use your announcements that you have just created, you need to enable the announcement option and upload a periodic sound in WAV format. We recommend the following sound in case you have selected a waiting time: „The estimated waiting time is…”. In case you have selected Position, the recommended text is “Number of people waiting in front of you:”
Note: The Language needs to be your base language, and the Sound Path has to be the folder that you created in the IVR sound library.
Note: If you would like to test the results and make sure that you have all the right sounds, you just need to add a variable and read-back option. The variable can be anything starting with a $ sign. With the read-back option, you have the opportunity to listen to the sounds as you can choose the Sound path for the created folder from the IVR library.


Comments
Can’t find what you need? Use the comment section below to connect with others, get answers from our experts, or share your ideas with us.
There are no comments yet.